We had a legacy application running on an MSCS cluster, and because of some process reasons, I was given 5 days to migrate it to another equipment. The challenge was to keep the same installations and configuration, but just release the out-of-support boxes and SAN.
The boxes were IBM x346 servers and the storage SUN Storedge 6920. There were 6 different SAN volumes connected to the cluster, each less than 100GB.
I directly thought of virtualizing the server as we have a set of Vmware infrastructure ESX 3.5 servers. They are not connected to any SAN.
Through Google, I found two KBs from Vmware: http://kb.vmware.com/kb/1002661 and http://www.vmware.com/pdf/vsphere4/r40/vsp_40_mscs.pdf but still was not sure on how to correctly set the virtualized environment copied with same cluster resources.
Continuing my research, I found this particular doc from a blessed one who still wants to be called evil, I don’t know why.
http://communities.vmware.com/docs/DOC-9080
Anyway, it helped me to build my own procedure as follow:
1. Move all cluster resources to Physical Node1 and import OS partition and any non-shared (non-Quorum) drives using VMWare Converter. Choose not to install VMWare tools at this time.
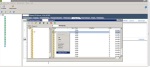
Here are the disks I had at the beginning:

2. Import Physical Node2 too in same conditions.
3. Start the VMs:
a. Make sure the network is disconnected and turn on virtualized nodes
b. Install VMWare Tools without VSS option, restart the VMs (I found that it helped to correctly have the new NICs to configure)
c. Clean up nodes IP addresses values in the registry, but leave all IP addresses that concern the cluster itself (you may just find the different entries with your nodes IP addresses to complete this, and delete the value)
d. Assign the IP addresses to the virtualized nodes
4. From a VI client, create the folder to host the cluster disk volumes (i.e: “ClusterDisks” was created directly in the root of the available storage)
5. Use a shell tool to access the ESX server and create the cluster disk volumes using command lines (I usually use putty)
a. Make sure of the virtual machines files path by typing command (I assume you have enough rights):
vmware-cmd –l
This gives:
[root@ESX05 root]# vmware-cmd -l
/vmfs/volumes/4ae8e9f9-5ab87043-a544-*****dd27e16/vm1/vm1.vmx
/vmfs/volumes/4ae8e9f9-5ab87043-a544-*****dd27e16/vm2/vm2.vmx
/vmfs/volumes/4ae8e9f9-5ab87043-a544-*****dd27e16/vm3/vm3.vmx
b. Create the quorum and other cluster disk volumes using a similar command to this (“1g” represents the disk size):
vmkfstools -c 1g -d eagerzeroedthick -a lsilogic “/vmfs/volumes//vmfs/volumes/4ae8e9f9-5ab87043-a544-*****dd27e16/ClusterDisks/Disk_Q.vmdk”
Creating disk ‘/vmfs/volumes/4ae8e9f9-5ab87043-a544-*****dd27e16/QUORUMS/Disk_Q.vmdk’ and zeroing it out…
Create: 100% done.
In my case, I used this opportunity to extend the disk volumes.
6. With the VMs off, ON EACH VM:
a. add HD to VM, but choose SCSI (1:0) which will create a new SCSI Controller

b. On SCSI (1:0), change to LSI logic, and set to “Virtual”
c. Add all your other cluster disks to the same SCSI controller (1:1, 1:2, etc.)
7. Failover cluster to Physical Node1, turn off Physical Node2
8. Bring online Node2 VM
9. If needed, in the Windows OS DiskMgmt.msc console, rescan the disks to see the Cluster shared drives. Then format the drive and assign the same drive letter as the old Quorum drive.

10. Use Robocopy to copy quorum and all other cluster disk volumes from Physical Node1 to Node2 VM.
robocopy.exe v: %clusterdisk% /copyall /s /e /sec /R:1 /W:1
11. From Windows 2000 resource kit (or a download), use DUMPCFG to get the disk signature of the physical Quorum drive from one of the physical nodes
>dumpcfg_x86.exe
[System Information]
Computer Name: ***********03
Cluster name (DNS): ***********03.*********.***
Cluster name (NetBIOS): **********03
System Root (install directory): C:WINDOWS
OS: Windows 2000 Server
Service Pack: Service Pack 2
Product: Windows 2000 Advanced Server is installed. [Note that it show Windows 2000 even if your install is Windows 2003!]
Terminal Services is installed.
[DISKS]
Disk Number: 1
Signature: 00D9FC05
…
12. From the VM, overwrite the signature with dumpcfg command (note that the Disk Number may be different on the Physical Node compared to the new disks on VM, so be careful)
dumpcfg -s %signature% %disk number%
ex: dumpcfg -s 00D9FC05 2
13. Shutdown Physical Node1
14. Restart cluster services or the Node2 VM… if all goes well the cluster should come up
15. Bring online the Node1 VM
YOU ARE DONE!!!
Notes:
I encountered many issues during the Conversion. The following links may be helpful if you are in the same situation.

The VMWare Converter Fails at Reconfiguration step:
http://networkadminkb.com/kb/Knowledge%20Base/VMWare/P2V%20of%20Windows%202000%20Reconfiguration%20failed.aspx
http://kb.vmware.com/selfservice/microsites/search.do?language=en_US&cmd=displayKC&externalId=1006296
The sysprep error on reconfiguration fixed:
http://vmetc.com/2009/08/18/how-to-add-sysprep-to-vmware-vcenter-for-vm-customizations-vmware-converter-also/
http://kb.vmware.com/selfservice/microsites/search.do?cmd=displayKC&docType=kc&externalId=1005593&sliceId=1&docTypeID=DT_KB_1_1&dialogID=31097134&stateId=0%200%2031095900
http://kb.vmware.com/selfservice/microsites/search.do?language=en_US&cmd=displayKC&externalId=1005593
An interesting post highlighting that chkdsk c: /f would be helpful before converting the SOURCE machine :
http://kb.vmware.com/selfservice/microsites/search.do?cmd=displayKC&externalId=1006559